Motorcycle Power Relay and Distribution Block
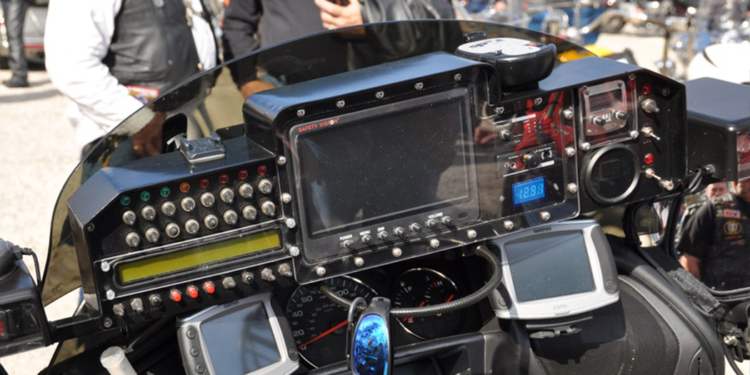
If you run any accessories on your bike, including electric gear like heated vests and heated grips, or even toys like GPS devices or radar detectors, hooking them up to the bike is always a challenge. The GPS could run off batteries, but the heated stuff has to run off the bikes power. If you hook things up directly to the battery, they work well enough, but will stay on, even after they key is turned off, and could result in returning to your bike only to find a totally dead battery. Additionally, if you hook up multiple accessories, the top of your battery starts to look like a snarled rat’s nest of red and black wires.
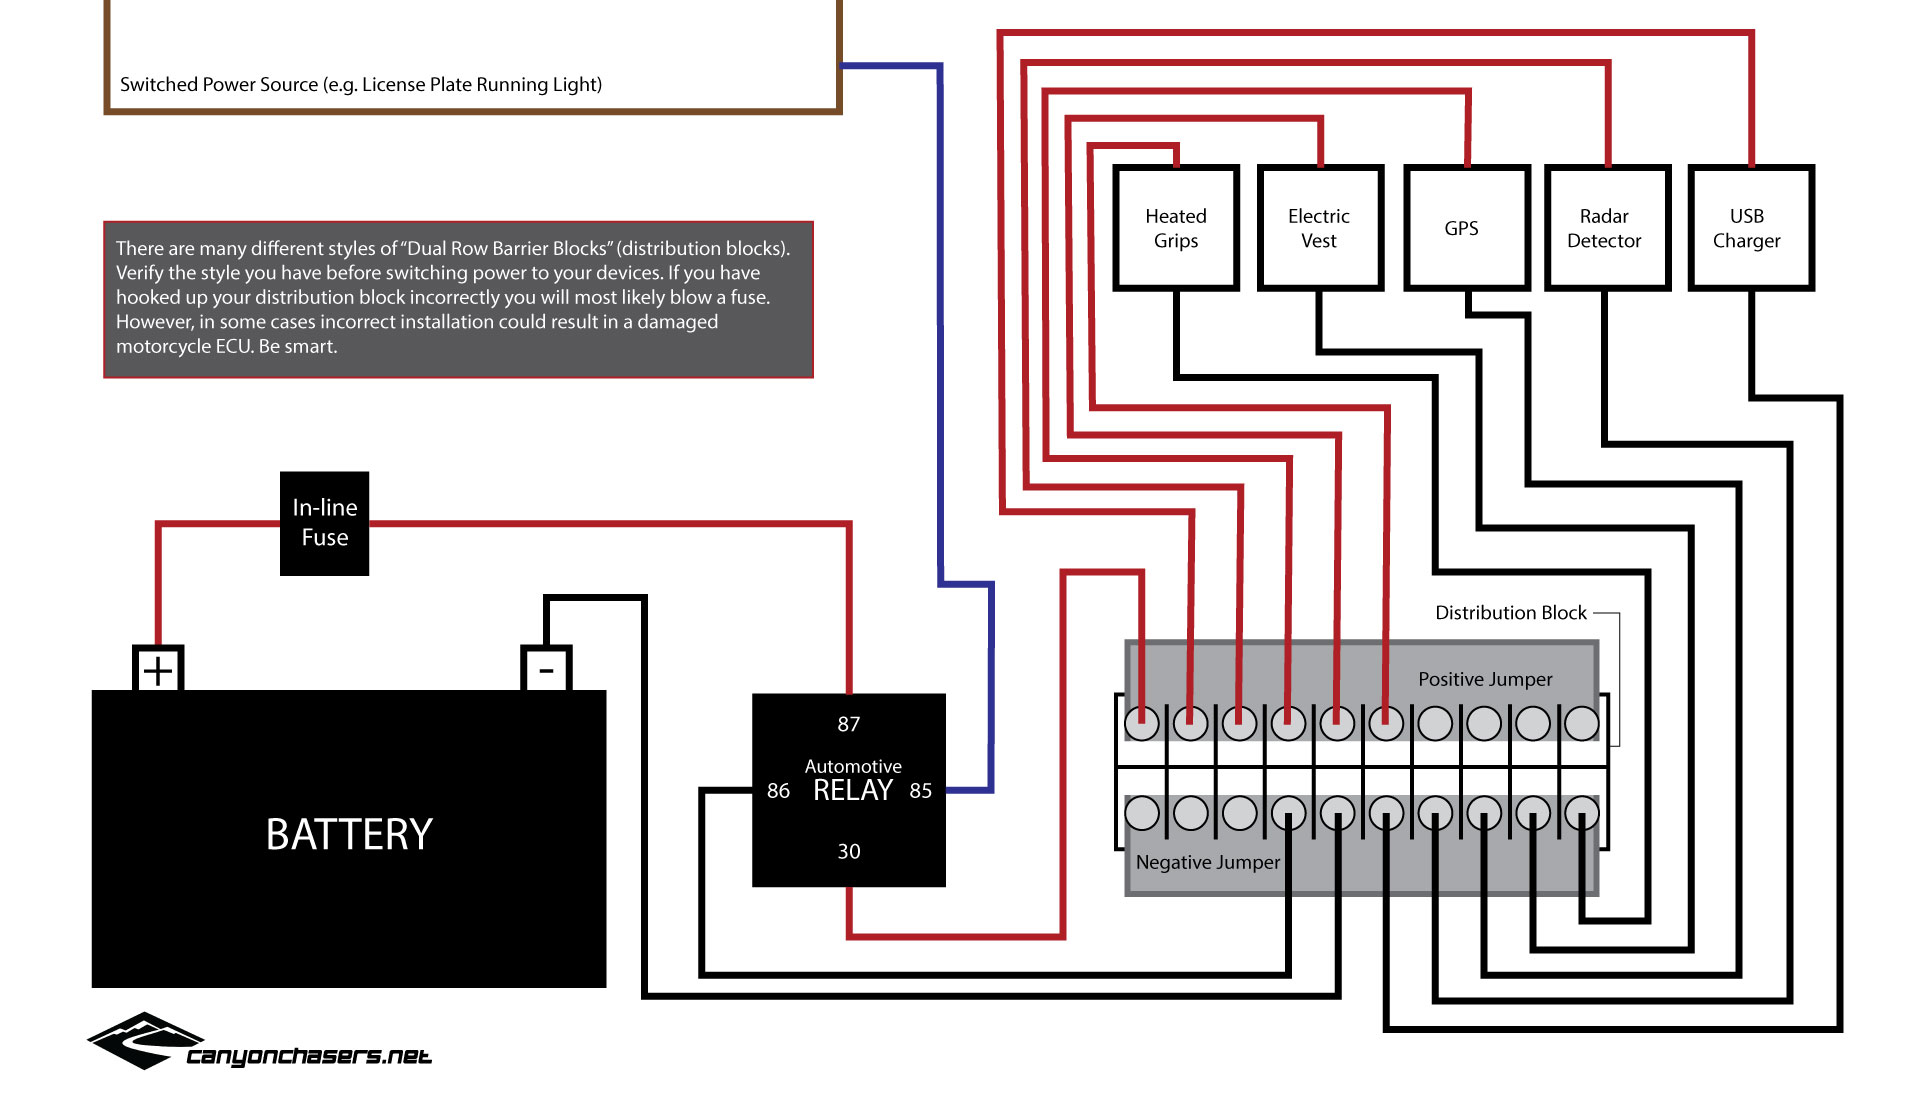
The best solution we’ve found is to install a relay/distribution block system. A distribution block allows you to hook up all your accessories on one place of your choosing. The relay powers the entire distribution block at once, and then powers it down as soon as you turn your key off, preventing accidental battery discharge.
How it works is like this: The relay has a positive wire going in, and a positive wire going out, (as well as a ground). The switched wire, a wire that is live when the key is on and not when the key is off, will provide enough amperage to open or close the switch inside the relay, thereby turning everything downstream of the relay on or off respectively.
This is also the true advantage to the distribution block/relay setup. All your accessories will still run straight off the battery, getting full advantage of a solid connection, but the relay will open and close the connection to your accessories to prevent damage or battery drainage, making your bikes accessories ‘switchable’ just like in your car. Turn off your car, the radio turns off, for example.
While monkeying with the bikes electrical system can sound daunting at first, it’s actually quite, almost alarmingly, simple. Besides, hooking up this relay/distribution system alleviates the need to really touch any part of your beloved bikes electrical system beyond the battery and one additional wire. Sounds easy right? Trust us, it is really easy! Besides, this job should not require you to cut any wires, or do any soldering.
Two Distinct Styles of Distrubution Blocks
The diagrams on this page are for the style distribution block we have listed on the shopping list. However, there are many different styles of distribution blocks and jumpers. It is critical that you wire your style correctly, otherwise you will create a direct short between your battery terminals, which could potentially damage your motorcycle or any other electrical component on your bike.
- Style One – The style of distribution block linked to on Amazon
- Style Two – The more common style – Typically found at most automotive parts stores or Radioshak
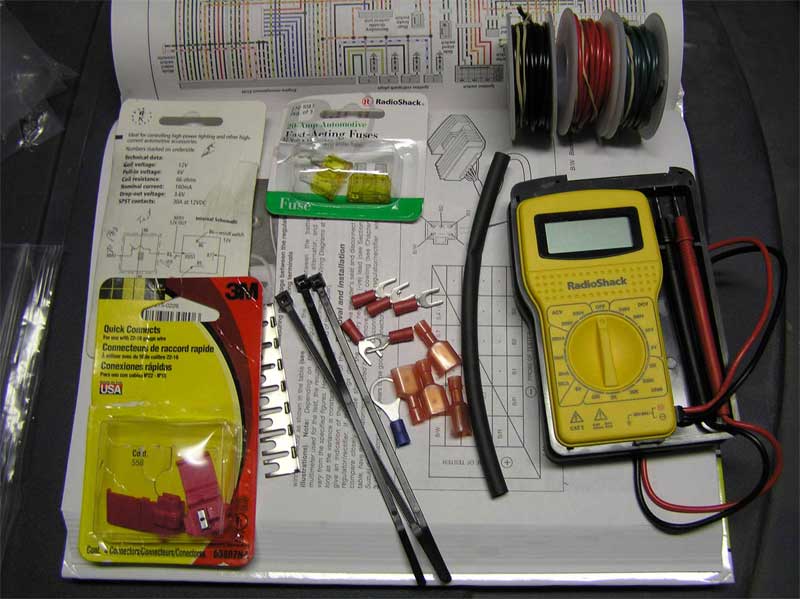
You’ll need to start off with a trip to you local auto-parts store for the parts. Purchase some red, black and blue wire, don’t get anything smaller than an 18-guage wire. Also, you’ll need the distribution block. They are actually called a “6 (or 12) Post Dual Pair Block. You’ll also need the metal part that will charge and discharge the entire block at once. This part is called a “6 (or 12) position jumper” and you may need to cut it in half. Pick up a small 10 or 20 amp in-line fuse. You’ll also need all the male and female plugs as well as a “Quick Connect” that allows you to tie into an existing wire without having to cut, solder or tape anything. Lastly, the most important part, the relay; you need a 12 Volt, 30 Amp Automotive Relay. It’s a small box with four pins coming out of one end.
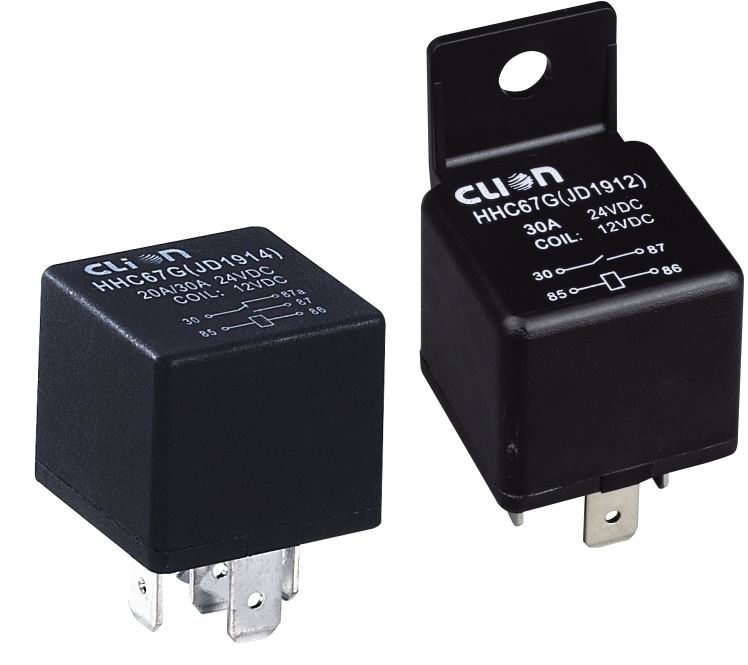
An automotive relay is just the little box with four male pins coming out of the bottom. And yes, they are simply an “Automotive Relay” and should be available most anywhere, even though we’ve found we’ve confused more than one autoparts store when they ask “What year and model” and we say “doesn’t matter. All I need is a generic ‘automotive relay'”.
In any case, here is your shopping list.
- 6-Position Row-Terminal and Jumpers
- Automotive Relay
- Inline Fuse Holder
- Red 18guage Wire
- Black 18gauge Wire
- Any third color wire you’d like – we use blue.
- Female Wire Crimp Connectors
- Insulated Fork Terminals
- Quick Connects to splice into wire
- Small Zip Ties
- Electrical Tape
- Wire Stripper, Cutter and Crimper tool.
- Digital Multimeter
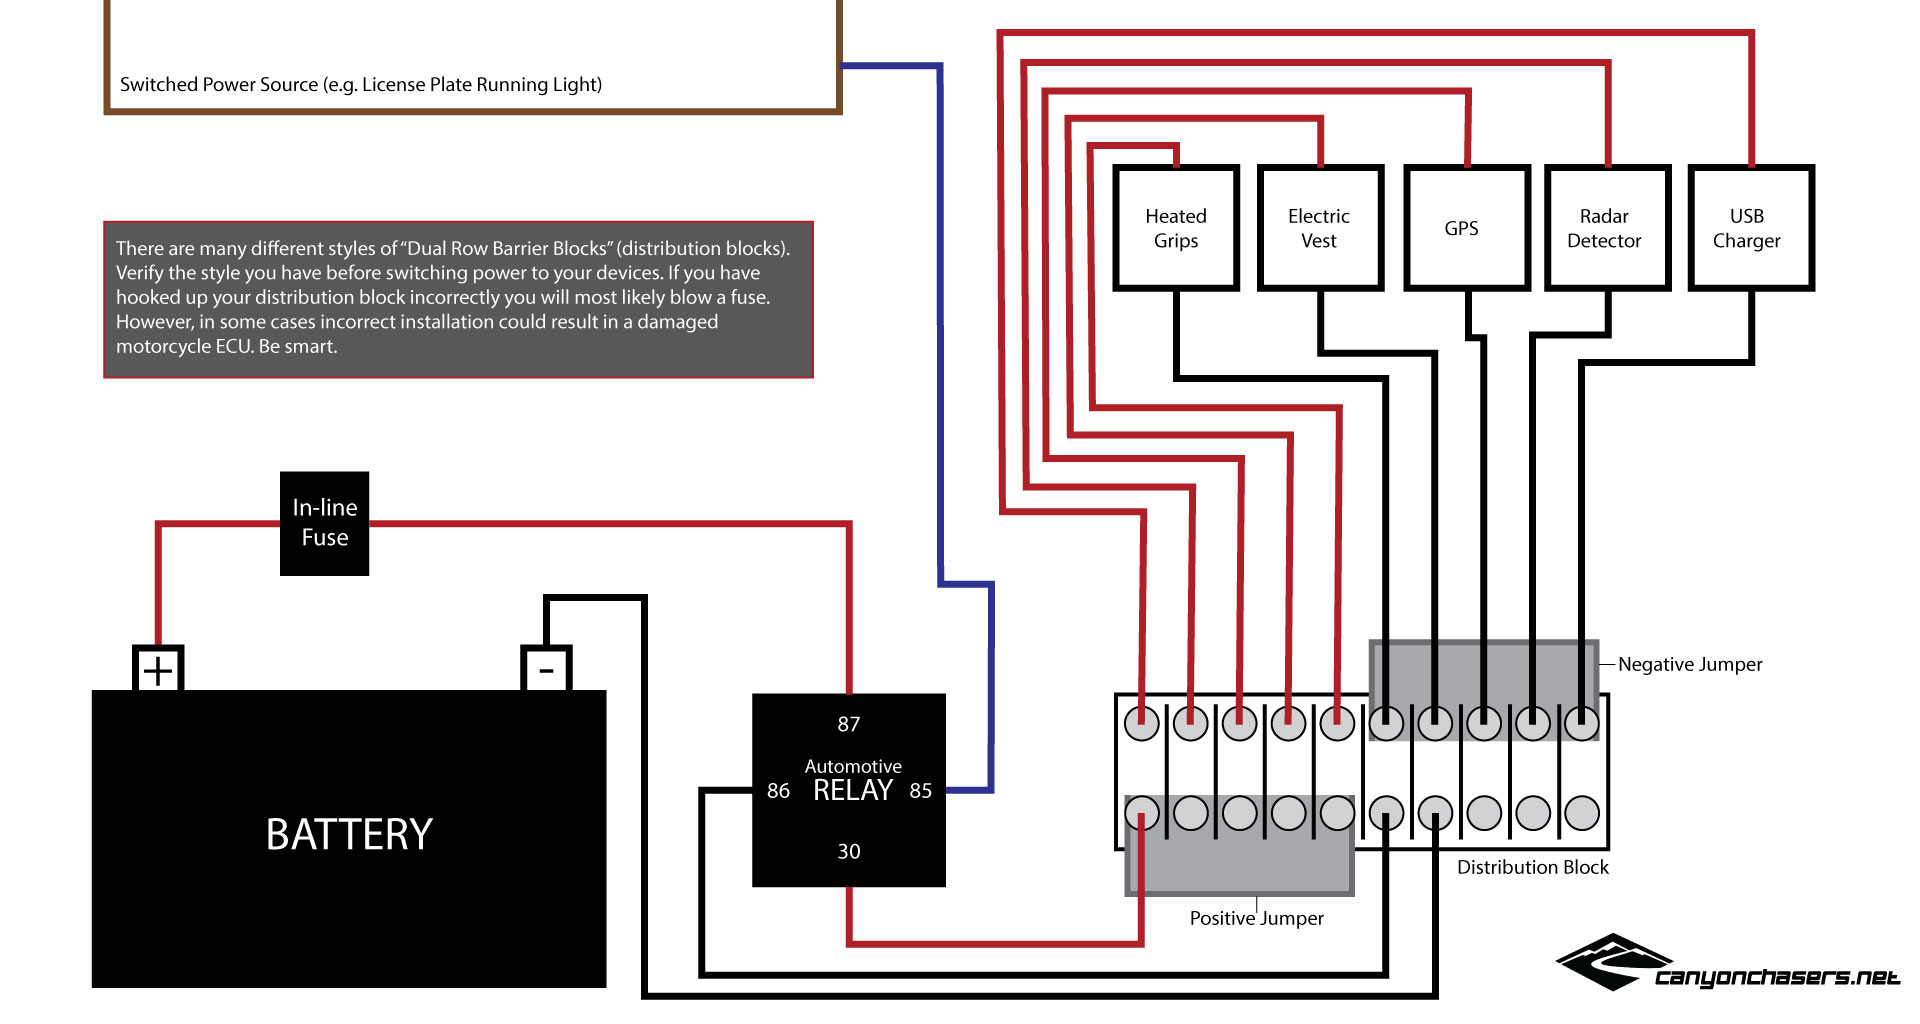
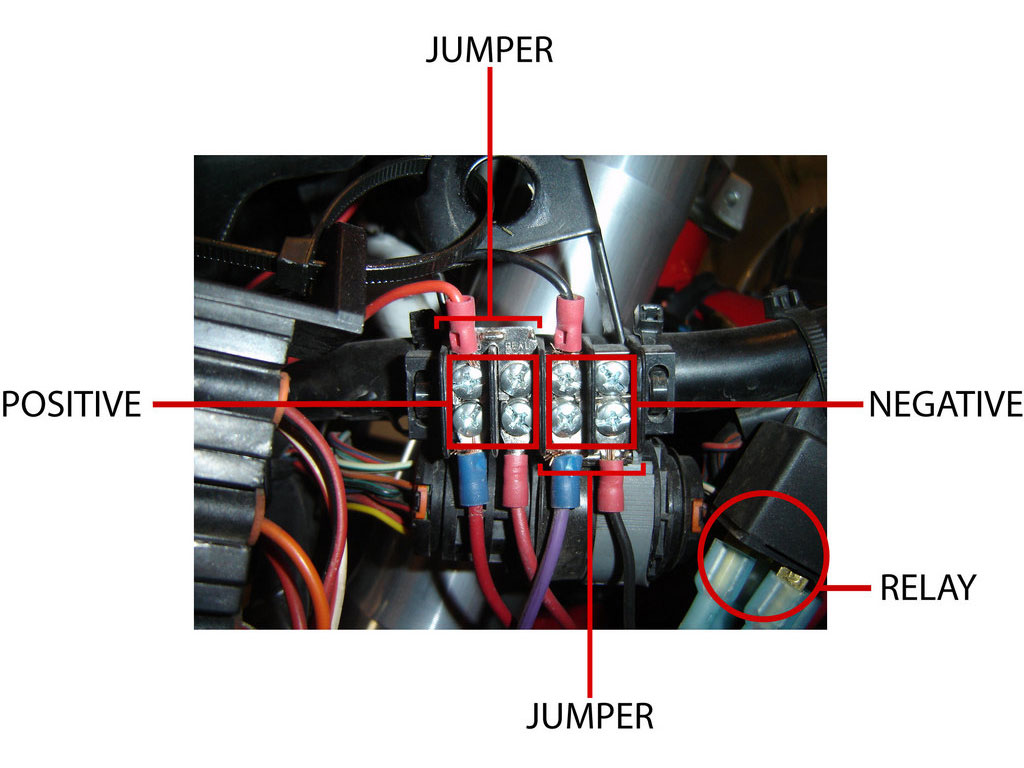
Now that you have all your stuff, start by taking off your front and back seat and finding your battery. Take your distribution block (Dual Pair Block), the part with all the little screws in the top of it, and the jumper, the metal plate. The jumper will connect half of the poles together by fastening it underneath half of the screws on the distribution block, this is so half of your block will be positive and the other half, with the help of the other half of the jumper, will be negative. You may have to cut the jumper in half or purchase two smaller jumpers.
Start with the black wire, the ground, from your battery. Run the ground from the negative battery terminal to where you’ve located your distribution block and connect that black wire to your distribution block. The jumper will now make it so that every other screw that touches the metal jumper plate will also be negative, or ground.
Next, take your relay and look at the bottom, or the back of the package to identify each of the four pins. Typically, most automotive relays label the four pins as such; But be warned, the relay you purchase may be different!!! But there should be markings on the relay or markings on the package to help you out.
- Pin 85: Switch
- Pin 86: Ground
- Pin 87: Switched Power Out
- Pin 30: Power In
If your relay has a key labeled 87A, that key will always be powered, even with the key off.
Right now, we are just worried about Pin 86, the ground. We want to connect a black wire between Pin 86 and the ground side of your distribution block. You’ll need to connect a female plug connector from one side of the wire, so it will just plug into the relay. You can also connect a forked plug onto the other side to interface with the distribution block, but I simply bared enough wire to wrap around the screw post and soldered the bared wire to prevent fraying, for the same basic result.
Next, take some red wire and connect it between Pin 30 and the positive side of your distribution block. This should be done just like you did the negative, black wire you just did. Wow, we’re half way there already!
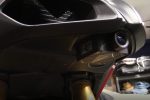
But now for the hardest part of the job. You need to find a wire on your bike that is live when the key is on and dead when the key is off. My personal preference is to tie into the running light for the rear license plate. That little white light that is required by law to be there in order to illuminate your registration tag in the dark. The light is only on when the key is on, plus it’s a very non-essential component of the motorcycle, meaning that if something should fail, the only thing you will lose is your running light; as opposed to tying into your fuel injection system or even your headlight.
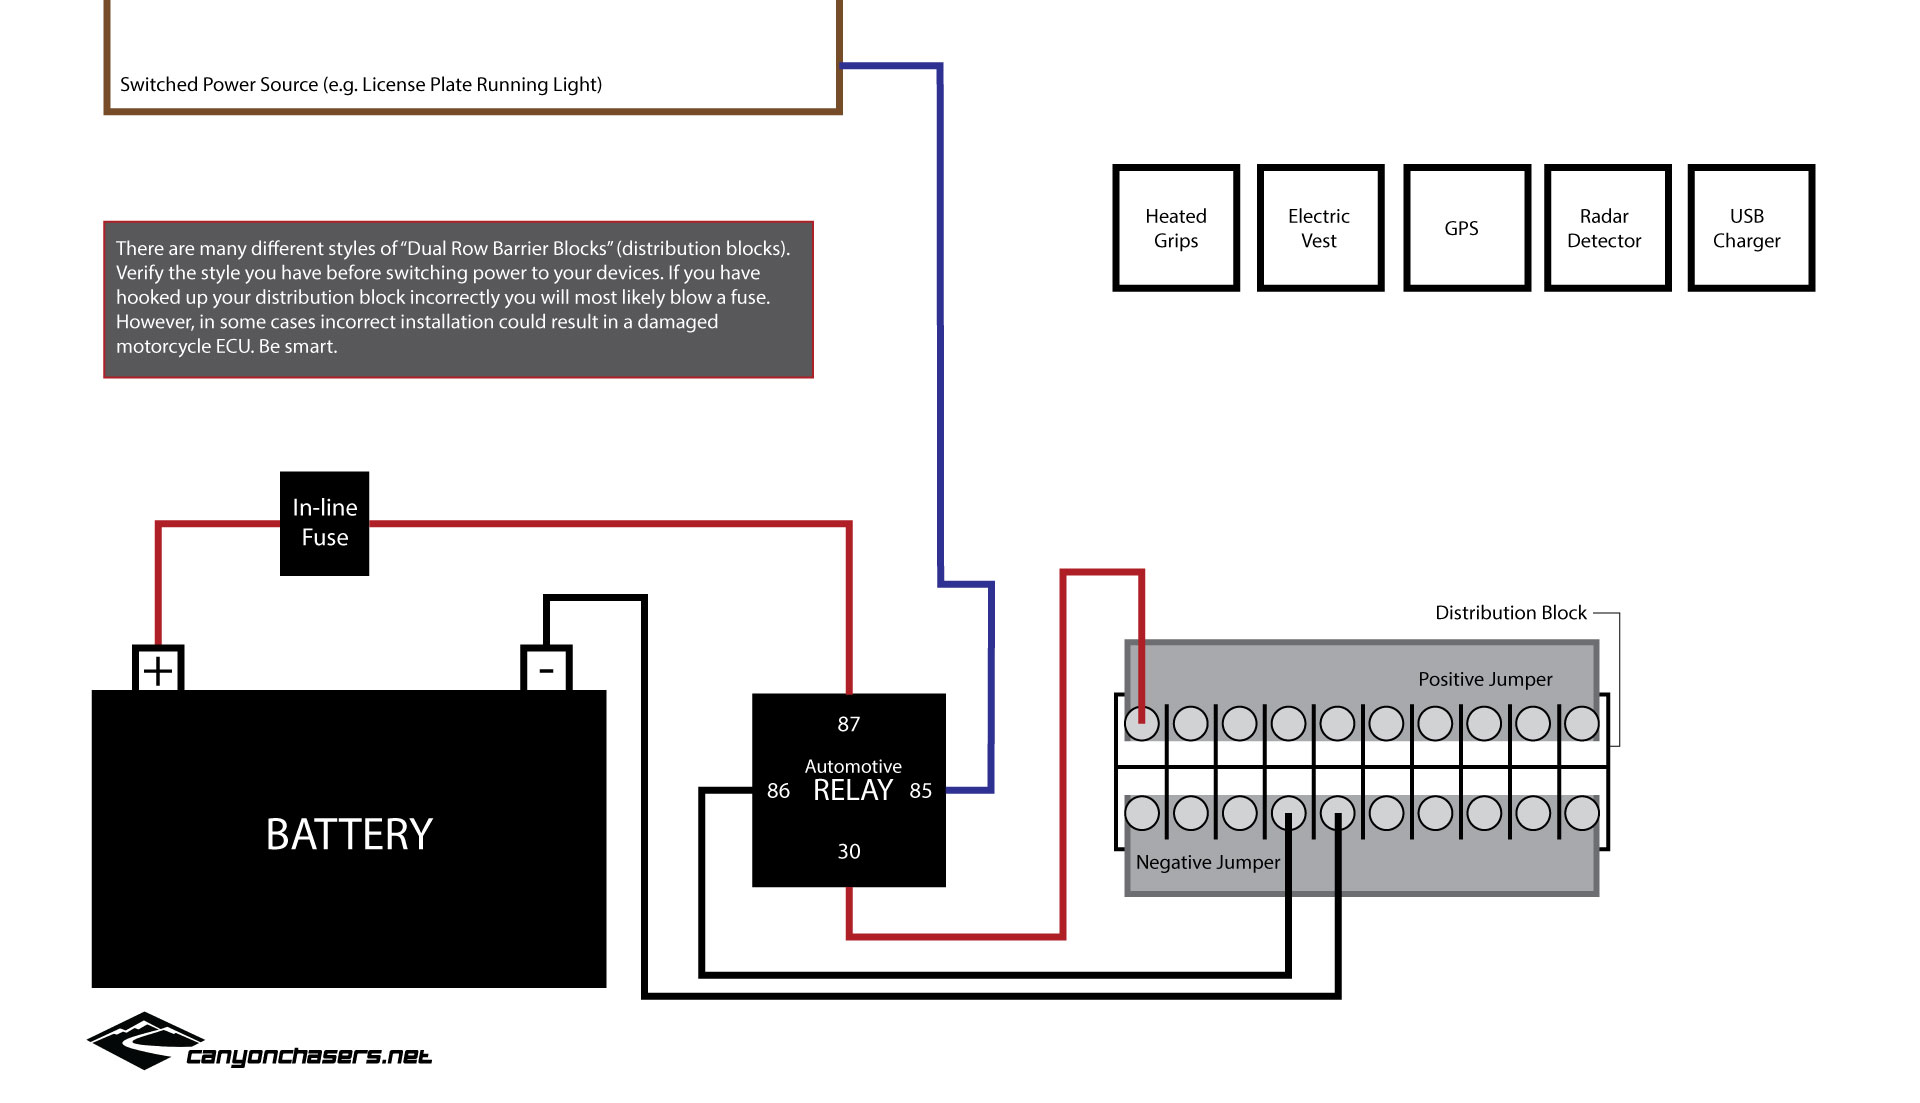
This wire, the switched wire, or the blue wire, does not need to carry much amperage. It just needs 12 volts to trip the relay; another good reason to use the running light. Take a quick connect, some blue wire and your license plate running light and connect it between the running light wire and pin 85. The quick connect will splice into the running light and the blue wire by squeezing it all together with a pair of pliers. Then clip on a plug to attach the blue wire to pin 85 on your relay. We are 75% of the way now.
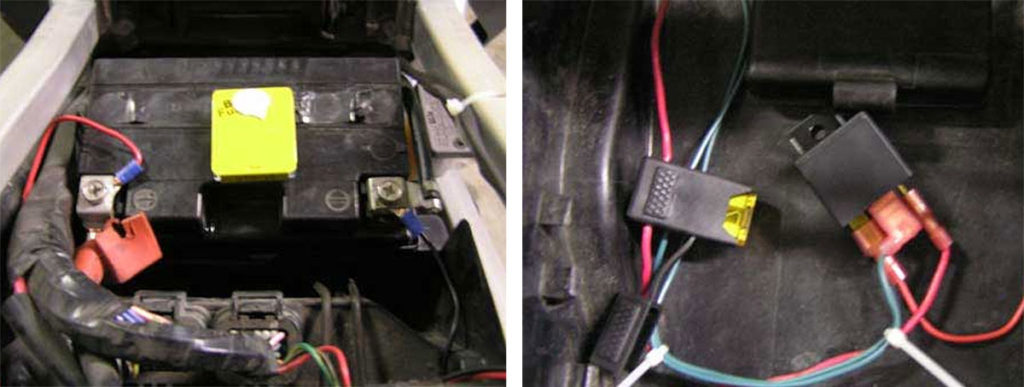
Now we need to tie it all to the battery. You want to place your inline fuse as close to the battery as possible. You may need to solder the inline fuse to your red wire, or you could use a solder-less clip to tie them together. You’re discretion, but I prefer to solder and use heat shrink tubing over the joint. Once your in-line fuse is in place, all you need to do is attach the red wire to pin 87 and you are done!
If you are like me, you’ll want to tuck everything out of sight and zip-tie everything together for a nice professional look.
Now that your distribution block is active, its just a matter of attaching all of your accessories up. To be safe, Mikey took a red and black sharpie and colored all the screws black for ground and red for positive. I’ve took that one step further and have only attached red wires to the positive side of the block and only attached black wires to the negative side.
Style-Two Distribution Block
Lastly, there are a couple of versions of the distribution blocks, depending on where you happen to find yours. Verify, or use a multimeter, to ensure you have hooked your style up correctly.
NOTE: A relay/distribution-block allows the rider to hook up multiple items at one place and have the all the accessories turn off with the key. A relay/distribution block typically runs directly off the battery with the relay getting its power from a running light or other switched source. Because the relay has virtually no draw, there is very little risk of overwhelming fuses. And because the distribution block, and all the accessories, receives power directly from the battery there is very little chance for damage to other electrical components.
Also, most bikes generate far more electricity than the bike needs; enough to have the ability to run two heated vests and a set of heated grips without putting any undue strain on the electrical system. However, every bike is different and you should check to be sure your bike can handle the added electrical workload. We’ve yet to find any bike that did not have a strong enough alternator to handle heated grips. On almost all of the CanyonChasers bikes, we run heated grips, up to two heated vests, GPS devices, MP3 players and radar detectors – all at once – and have never had any problems.

I’m planning on doing this project on my Multistrada. Question, the 87a terminal, can that be used for connecting my sae plug for my battery tender? or is it best to just keep that directly connected to the battery?
Thanks for all of your content. Owning a Multistrada a lot of the how-tos are written just for me. Just did a coolant change last week.
HI and thanks for the fun article. Please be aware you draw 87 as input from positive battery but mention 30 as input. I think 87 is the switched output though it may not matter. Thank you